
DDoSed while on a holiday - How to configure CloudFlare correctly

Recently my multi-tenant food ordering app got hit with a massive DDoS attack in which one of our merchants was specifically targeted. And I'm talking massive, in a matter of seconds, around 30 million requests got fired from thousands of IP addresses globally, and even though we had Cloudflare protection in place, some of that traffic still made it through to our origin server and caused downtime.
To make things worse, this happened on a friday evening - the busiest period on our platform - and as if that wasn’t already enough - I was also on a holiday at the time, turning this into a true nightmare scenario that I want to avoid at all costs going forward.
Now, I know what you're thinking:
"Sabatino, you had Cloudflare protection enabled, how did this happen?"
Well, that's exactly what we're going to dive into today. Because here's the thing - having CloudFlare protection enabled doesn't mean you're bulletproof, and there are always lessons to learn when things go sideways.
This blogpost is also available in video form:
The attack
So let's break down exactly what happened during the attack. In a matter of seconds, we were hit with around 30 million requests from thousands of IP addresses across the globe. Now, Cloudflare did its job - it mitigated about 98% of that traffic, which sounds great until you do the math. 98% of 30 million still means 600,000 requests made it through to our origin server.
And here's where things got ugly fast. Our load balancer had to serve 600k requests in a matter of seconds, and because all these requests were hitting our homepage, NGINX had to communicate with a PHP-FPM process for every single one of them. PHP-FPM can only handle a limited number of concurrent processes. By default, it's usually configured for maybe 50-100 processes per server max. So when 600,000 requests start piling up, NGINX starts queuing all these requests waiting for PHP-FPM to become available.
This creates a massive backlog and memory usage starts spiking because NGINX has to hold all these pending connections in memory, and CPU usage goes through the roof as the system desperately tries to manage this queue. Eventually, we hit the "too many open files" limit because each queued connection requires at least one file descriptor, and the whole thing just collapsed under its own weight.
If these had been requests for static assets - images, CSS, JavaScript - NGINX could have handled them directly without ever touching PHP. But with homepage requests every single one needs to go through the full PHP stack, and that's where our bottleneck was.
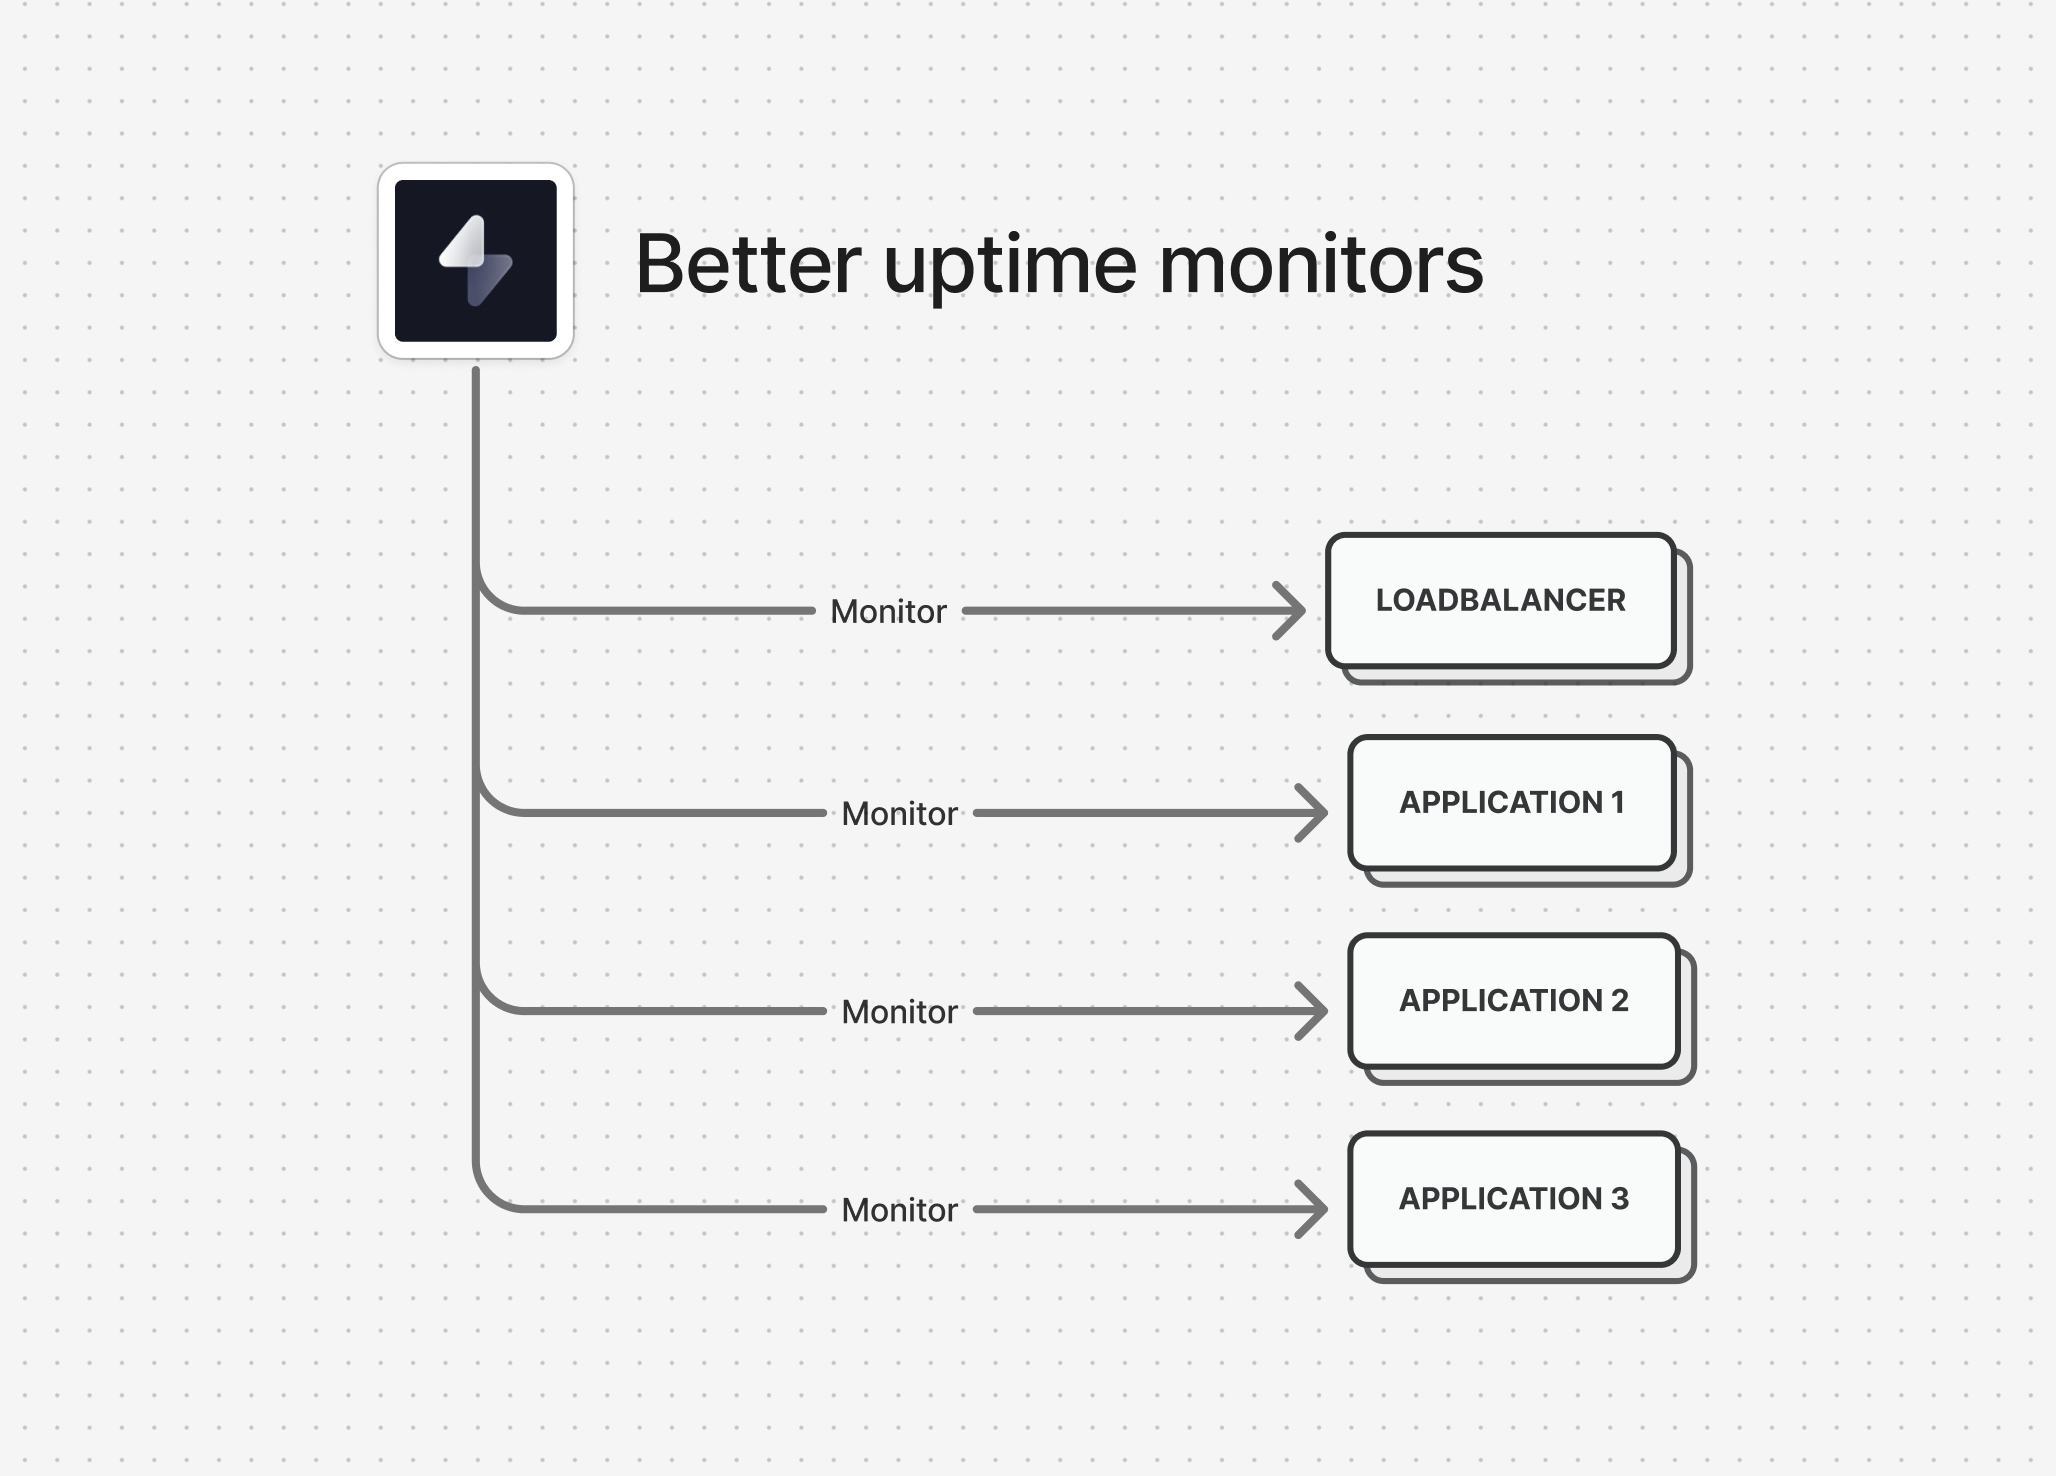
Now, we monitor all of our infrastructure components using BetterUptime - that's our 3 application servers plus our load balancer. If one of our app servers goes down, it's not ideal, but it's not an emergency. We have redundancy there. But our load balancer? That's our single point of failure. When that goes down, everything goes down.
And sure enough, at 4:30 PM on a Friday - peak dinner ordering time - my phone starts buzzing with emergency alerts. I'm on holiday, trying to enjoy my evening, and suddenly I'm getting notifications that our entire platform is unreachable.
On the map you can see the attack take place as all order activity stops for around 20 minutes and eventually resumes.
Now, there was one silver lining in all of this chaos - our database didn't crash. While our load balancer was choking on all those requests and our PHP-FPM processes were maxed out, our database server was actually handling things relatively well, because we cache things aggressively. This meant that once we got the attack under control, we didn't have to deal with data corruption or a lengthy database recovery process on top of everything else.
Responding to the attack
So now let's talk about how we actually responded to this crisis. The good news is that triaging the issue wasn't too complicated, and that's entirely thanks to our uptime monitoring setup. We monitor all of our application components separately - that's our 3 application servers plus our load balancer. When I got the downtime alert, I could immediately see that our individual application servers were still reachable - they were responding to health checks just fine. This told me that the problem wasn't with our Laravel application itself or our database. The issue was somewhere in front of our app servers.
So I quickly checked our load balancer metrics and saw that it was completely maxed out - CPU and memory through the roof, and those "too many open files" errors flooding the error logs. At this point, I knew we were dealing with some kind of traffic surge, but I needed to figure out if this was legitimate traffic or an attack.
That's when I jumped into our Cloudflare dashboard, and there it was. A big red banner alerting us of an ongoing DDoS attack. Cloudflare's threat intelligence had already identified the pattern and was showing us real-time metrics of what they were blocking versus what was getting through.
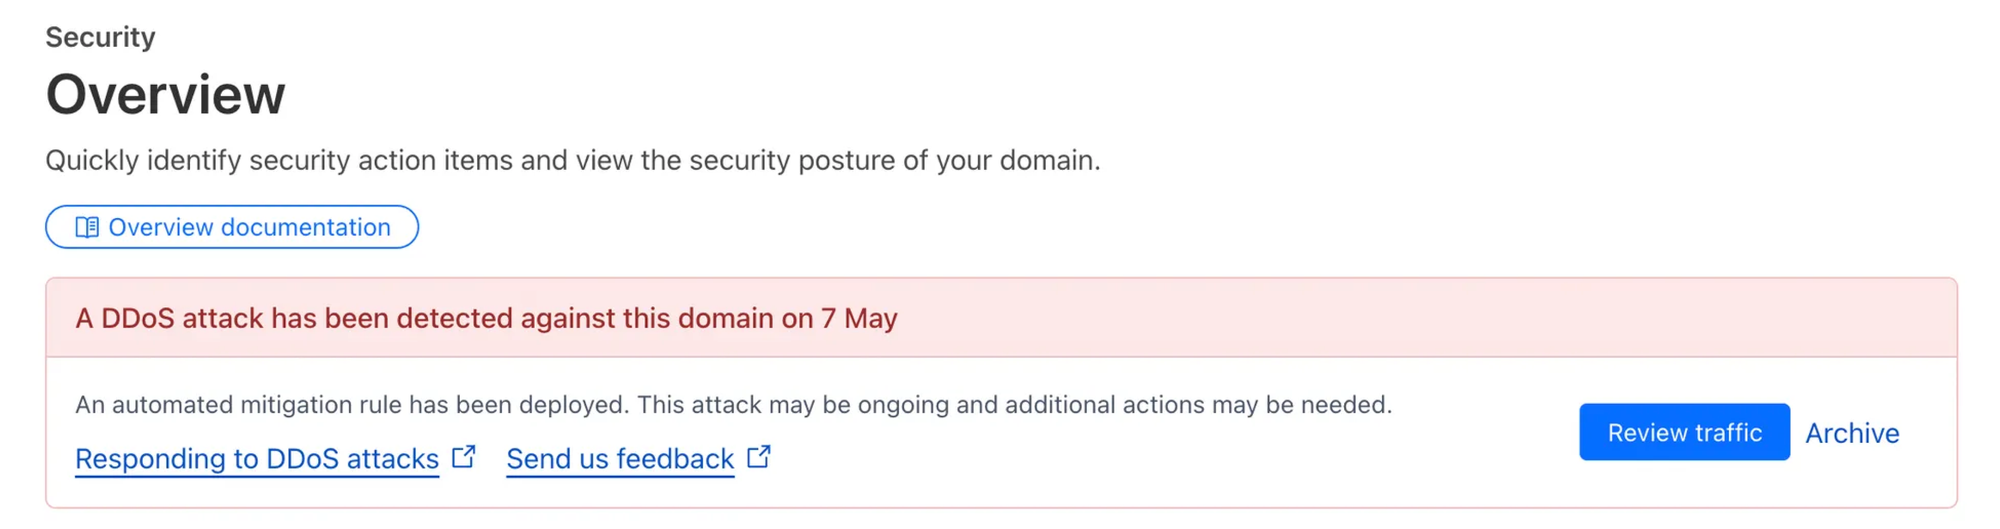
This is where having proper monitoring and the right tools really paid off. Instead of spending precious minutes trying to figure out what was wrong, I could immediately see the full picture and start focusing on mitigation in a matter of minutes.
After some quick investigation, I made the decision to hit Cloudflare's "Under Attack" button. For those who haven't used this feature before, it immediately puts your site into a high-security mode where every visitor has to pass a challenge before they can access your site. And it worked. Almost instantly, the malicious traffic stopped hitting our origin server. Our load balancer started breathing again, CPU usage dropped back to normal levels, and our legitimate users could access the platform again. But here's the thing - the "Under Attack" mode is not a permanent solution. It adds friction for your real users too and more importantly - legitimate bot traffic, like webhooks from Stripe or from our payment terminals were blocked as well. So while this bought a bit of time to dig deeper, this was definitely not a solution we could keep in place for longer than 10-15 minutes.
With the immediate crisis handled, I could finally dig into the logs to understand what was actually happening. And that's when I discovered something crucial - this wasn't a random attack on our entire platform. The traffic was specifically targeted at one of our merchants. All 30 million requests were hitting the same merchant's storefront URL.
This was actually a game-changer for our response strategy. Once I identified which merchant was being targeted, I could isolate their configuration and implement protections just for their subdomain without affecting the rest of our platform. This meant I could take more aggressive defensive measures for that specific merchant while keeping the experience smooth for all our other merchants and their customers.
Cloudflare has a feature called "Configuration Rules" that lets you apply different settings based on matching expressions - essentially conditions that you define. For example, you can say "if the hostname equals merchant123.example.com then enable Under Attack mode".
After this modification - around 20 minutes into the attack - the platform was able to resume its operation normally because I turned off the global under attack mode, and the rest of the evening went by with no more disruptions.
After we did some crisis communication with our merchants we could start taking our firewall security more seriously - so let’s take a look at how we tweaked our CloudFlare firewall to prevent this in the future
Configuring CloudFlare to prevent DDoS attacks
Alright, so now that we've covered what happened and how we responded, let's dive into the actual Cloudflare configuration and talk about how you can set up your defenses to handle DDoS attacks more effectively. First thing to understand is that Cloudflare's DDoS protection works on multiple layers. You've got your basic DDoS protection that's enabled by default - this handles the really obvious stuff like massive traffic spikes from known bad IP ranges. But for more sophisticated attacks like the one we faced, you need to configure additional rules and settings.
The goal here isn't just to show you what we have configured now, but to explain the thinking behind each rule so you can adapt this to your own setup. Because here's the reality - every application is different, and what works for a multi-tenant food ordering platform might need tweaking for your use case.
Let me walk you through the key areas you should focus on. We'll start with Rate Limiting, arguably the most important rule of all.
We didn’t have any rate limits set up (except for the ones defined in our Laravel app), but the idea here is to prevent the request from reaching your origin.
We have 3 rules set up:
- Block after too many requests: After a specific amount of requests in a period, we block the offender for an entire day. For example, after 500 requests in a minute, you’re blocked. It’s important to balance this rule for your expected usage, because you don’t want to end up blocking legitimate traffic.
- Time out after too many requests: Basically the same rule with much lower limits. For example, after 20 requests in a minute, you’re blocked for a single minute (this rule makes it easy to tweak the more aggresive 'block' rule)
- POST rate limits: finally, to prevent registration abuse, it’s a good idea to have limits on POST requests, for example 10 per minute
Next, we have around 10 custom rules we introduced after the attack, I divided them in 3 categories. Let's start with the 'block' rules. Do note that the order is important, the 'block' rules are placed at the bottom:
- Block specific user agents: When we got attacked we saw a surge in traffic from specific availability checkers. This was likely the attacker checking to see if there were any holes in the WAF to see if he could strike from other locations
- Permaban specific IP's: Specific IP addresses that are known bad actors will get banned from the system
- Block specific requests: This one helps us mitigate probing attacks where bots try to check if we are running certain software, like Wordpress. We just block every request to a direct php file, or any Wordpress specific dir, .env file, .git dir etc. etc. This rule is basically a 'trash can' that stops polluting your logs with nonsense traffic.
- Block specific continents (exclude known bots): Then, we block specific continents, because our system is tailored to the Belgian market, it doesn’t make sense to allow the entire world on our platform. We basically only allow European traffic except for trusted bots.
- Challenge non-essential countries: Then we went a level deeper and built a list of essential countries. Other countries within Europe can access the system but will get presented with a challenge - think of people going on a holiday within Europe - they can still access the platform, but they might get asked to solve a challenge
- Challenge specific pages: And finally specific pages, like the onboarding page for example, will get a challenge as well
Next up, we have our ‘just in case’ rules that are toggled off, but can be toggled on when needed. These rules have a higher priority than the block rules.
- Elevated security with block: this rule is set in place so I can isolate specific parts of the application if we were to have another DDoS attack - this gives me peace of mind
- Elevated security with challenge: and the same goes for this rule, but instead of blocking traffic we will challenge traffic
And finally, let’s take a look at our bypass rules - these rules bypass some (or all) rules if they match.
- Whitelist IP's: Specific IP addresses - like our office - get some higher privileges. It’s not a good idea to bypass all rules, but it did make sense for us to loosen the security measures a bit from traffic coming from trusted sources
- Allow known bots: we have some trusted bots - like our uptime monitor - that we gave a special key that bypasses some rules in the WAF. So if the request comes in with a trusted key, we bypass certain rules (eg. ?key=trustedbot)
- Allow specific requests (webhooks, payments, ...): Again, our webhooks get a special key that bypass certain rules, so we never block our legitimate webhook traffic. This rule is split out so we can have separate analytics.
- Allow app review & playstore checks: This one is kinda funny, but our application got rejected because the Google and Apple appstore testers got blocked on the WAF, leading to some frustrating situations before I figured out the WAF was the culprit (sorry to the testers 😬)
Final words
Looking back, there are definitely some key lessons I want to share with you.
First, I am very happy that I did have Cloudflare activated. If I didn’t have Cloudflare, the incident would’ve been catastrophic - so if there’s a single takeaway from this video it’s to enable Cloudflare (or another WAF) before you need one. Don't assume your current protections are enough because we thought having Cloudflare meant we were covered, but we learned that 2% of 30 million requests was still enough to bring down our infrastructure. Rate limiting and custom WAF rules aren't just nice-to-haves - they're an essential part of your security.
Next, monitoring is absolutely critical. Without monitoring our infrastructure components separately, it would have taken me much longer to pinpoint that the load balancer was the issue while our app servers were fine. That kind of visibility can save you precious minutes during an incident.
Finally, having a plan before you need it makes all the difference. The "Under Attack" button bought us time, but wasn’t a long-term solution. Now we have those elevated security rules pre-configured so I can flip them on instantly if this happens again, without scrambling to figure out the right settings during a crisis.
Our merchants also appreciated the transparent communication during the incident and the fact that we published a post-mortem 48h after the incident.
If you're running any kind of production application, I highly recommend taking some time now - before you need it - to configure these kinds of protections. Because trust me, you don't want to be figuring this stuff out at 5 PM on a Friday while you're on holiday.
That's it for this one. If you found this useful, consider subscribing to the newsletter and I'll see you in the next one!
No spam, no sharing to third party. Only you and me.